![]()
 This Sukkot I got the chance to lead a workshop for the Beacon Sukkah Project, a Sukkot-long program of arts and lectures organized by the Beacon Hebrew Alliance and Beacon Arts in Beacon, New York. To fit this year’s theme, “Open to the Sky,” I led an introduction to drawn thread embroidery, and thought I’d share the project with you here.
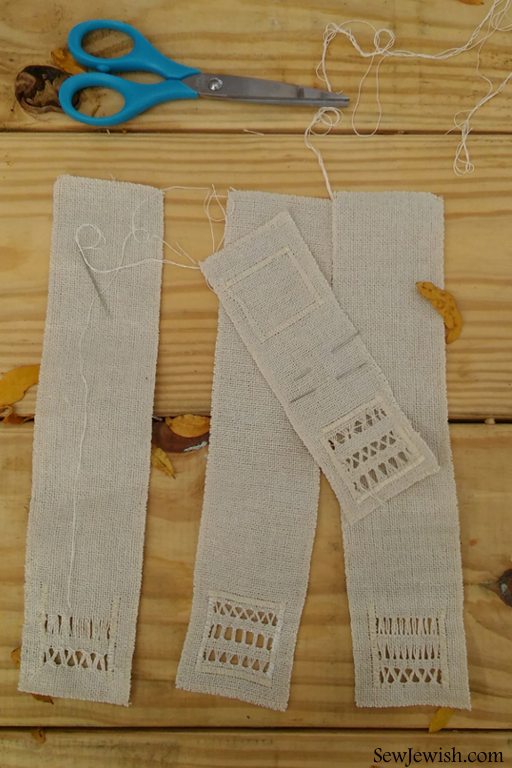
For the workshop, we embroidered bookmarks made from coarse hemp, which had lovely large fibers to work with. The bookmarks were pre-prepared with two rows of satin stitches, which created the area we embroidered. Generally, you wouldn’t need these stitches in a project, because the drawn thread technique involves reinforcing the edge of the area of removed threads with stitching or weaving the drawn threads back into the surrounding fabric. But for this workshop, to simplify things, we started with the reinforcing stitches.
The class focused on learning the simple hem stitch, and in no time everyone was creating their own variations — it was definitely a group of embroidery rebels.
The workshop was held in the community’s sukkah, which is set up in a public park. We got lucky with the weather. Not only didn’t it rain, it was a nice bright sunny autumn morning, great for embroidery work. And with little autumn leaves falling on us as we worked, it was absolutely lovely.
Introduction to Drawn Thread Embroidery
Open to the Sky: The Beacon Sukkah Project – October 2017
You’ll need:
- Fabric bookmark
- Needle
- Embroidery floss
- Scissors to share
For clarity, the instructions use the following terms:
thread = fibers in the fabric
floss = embroidery floss
Instructions
Remove Threads
Note: Remove only threads in the embroidery area between the reinforcing stitches.
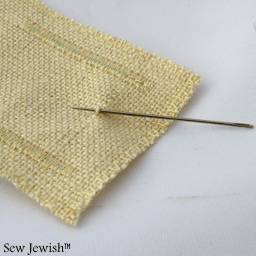
Use the tip of your needle to pull up one thread in the middle of the embroidery area. Use the scissors to cut the thread, being careful not to cut any other threads.
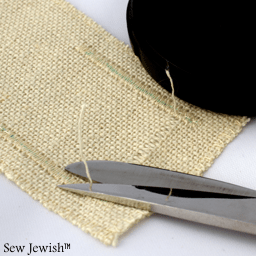
Use the needle to tease the loose threads up to the reinforcing stitches at the edges of the embroidery area. Cut away the loose threads close to the reinforcing stitches, being careful not to cut any other threads.
Remove 6-7 adjoining threads (you can vary the number), removing only those that are bordered by the reinforcing stitches.
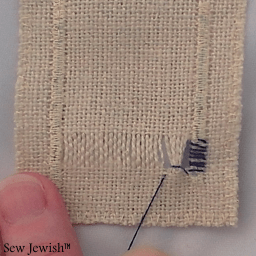
Anchor the Embroidery Floss Using the Satin Stitch
Thread the needle with one strand of embroidery floss.

Bring the needle up through the middle of the reinforcing stitches on the right of the drawn threads.
Make parallel stitches around the reinforcing stitches, being sure to encase the end of the floss at the back of the fabric.
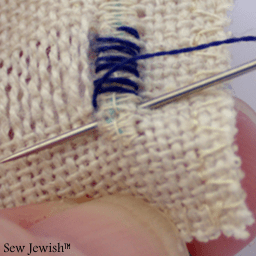
Make the last stitch when the needle emerges from the fabric 2 threads below the open area.
At the back of the fabric, trim the end of the floss.
Embroider a Line of Hem Stitches
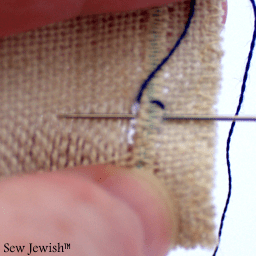
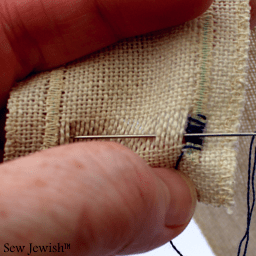 Pass the needle behind 6 threads in the fabric (you can vary the number) and pull the needle and thread through to the front of the fabric.
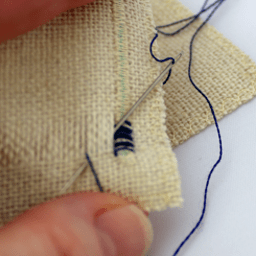 Use your thumb to hold the trailing floss below the open area. Pass the needle under the same set of threads and bring it up through the fabric on the left side of the gathered threads, 2 threads below the open area.
 Pull the floss to gather the threads.
 Continue embroidering across the open area. If you approach the end of the open area and see that you don’t have a full set of threads to gather, adjust. (For your future projects, you can count the number of threads you need and position the reinforcing threads accordingly.)
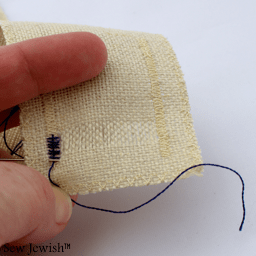
Anchor the End of the Embroidery Floss with Satin Stitches.
 As you did on the first end of the open area, make parallel stitches to cover the reinforcing stitches on this end.
Put the needle down through the fabric to the back of the bookmark, and pull the thread through.
Pass the needle between the satin stitches and the fabric. Trim the floss close to the stitches.
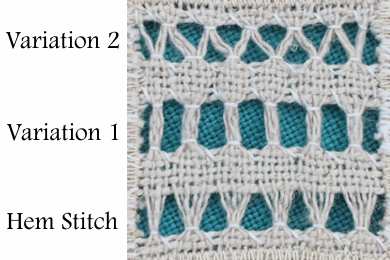 Variation 1
Hem stitch both sides of the drawn thread area, gathering the same sets of threads each time.
Variation 2
Hem stitch both sides of the drawn thread area, but on the second side bring together 3 threads from one set of gathered threads and 3 threads from the next set.
 Maria Bywater is the author of Sew Jewish: The 18 Projects You Need for Jewish Holidays, Weddings, Bar/Bat Mitzvah Celebrations, and Home. She teaches hands-on Judaica sewing workshops.
